

Guided setup
The Setup Wizard is the admin portal’s first-run path. It takes an empty deployment to one live, embeddable assistant: pick a model provider, create an assistant, and copy the embed snippet. The rail counts four steps (Welcome, Model provider, Assistant, Frontend integration); a final Done screen follows. Everything the wizard does is also reachable from the individual admin pages, so nothing here is a one-way door.
When the wizard appears
Section titled “When the wizard appears”The root route / runs a first-run check. It queries the admin API for assistants and branches on the result:
- No assistants → it redirects you to
/setupand the wizard runs. - At least one assistant → it redirects you to your home page (the dashboard for most roles) and marks the wizard complete.
The database is the source of truth. A localStorage flag (diosc-v2-wizard-complete) is a fast-path hint only — if a browser reset clears it, the check still lands you correctly because it re-reads the assistant list. Once any assistant exists, / never routes to the wizard again. You can still open /setup directly to run it again.
The layout
Section titled “The layout”The wizard is a two-pane screen. A fixed progress rail runs down the left; the active step fills the stage on the right.
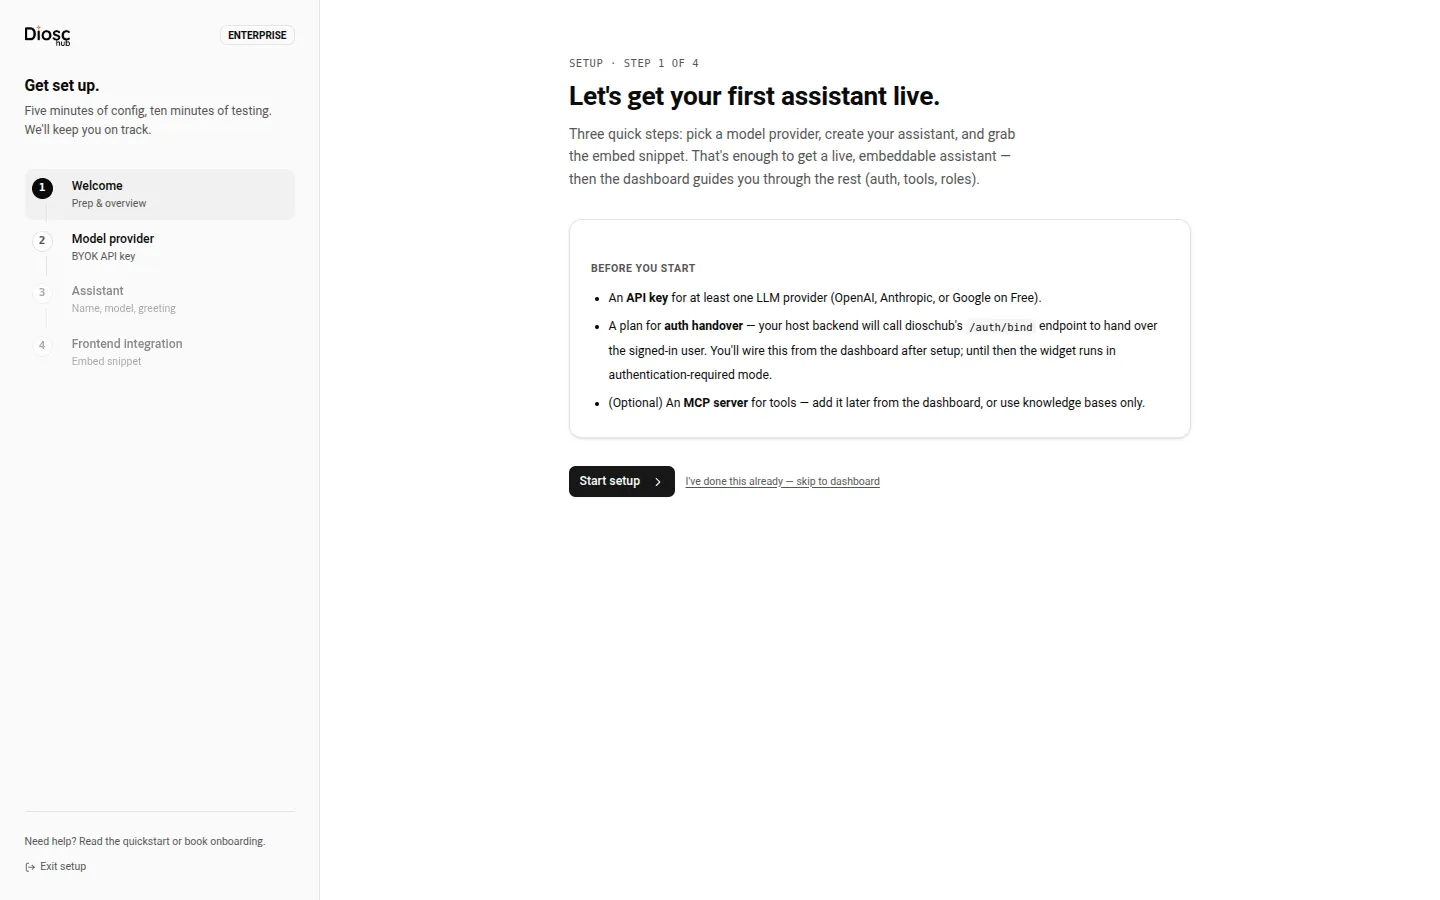
The Welcome step on a fresh hub. The rail lists the four steps you move through; the stage shows the prep checklist before you start.
The rail shows:
- A tier badge (
FREE,PRO, orENTERPRISE) reflecting the deployment’s license. The wizard is identical on all tiers; the badge is informational. - The four working steps — Welcome, Model provider, Assistant, Frontend integration — each with a number, a label, and a one-line subtitle. The fifth step, Done, is not shown in the rail. A completed step shows a green check.
- Exit setup at the bottom, which leaves the wizard and goes to the dashboard.
Jumping and locked steps
Section titled “Jumping and locked steps”You can click a step in the rail to jump to it, but only backward or one step ahead of where you are. Steps further ahead are locked (dimmed, not clickable) until you reach them in order. The bottom of the stage shows STEP n / 4 and a Back link on every step after the first.
Your progress persists in localStorage — the current step (diosc-v2-wizard-step) and the data you have entered so far (diosc-v2-wizard-data). Close the tab mid-setup and you resume where you left off. The one exception is the backend auth-binding key on the last step, which is held only in memory and shown once (see below).
Step 1 — Welcome
Section titled “Step 1 — Welcome”The Welcome step is a prep checklist. It states what you need before starting:
- An API key for at least one LLM provider (OpenAI, Anthropic, or Google on Free).
- A plan for auth handover — your host backend will call the hub’s
/auth/bindendpoint to hand over the signed-in user. You wire this from the dashboard after setup; until then the widget runs in authentication-required mode. - Optionally, an MCP server for tools, which you add later from the dashboard.
Start setup advances to the model step. A secondary link, I’ve done this already — skip to dashboard, leaves the wizard.
Step 2 — Model provider
Section titled “Step 2 — Model provider”This step picks the provider that will run your assistant, following the bring-your-own-key model. You choose one of six provider cards:
| Card | Provider |
|---|---|
| OpenAI | GPT models via the OpenAI API |
| Anthropic | Claude via the Messages API |
| Gemini via the Generative AI API | |
| AWS Bedrock | Claude, Llama, and others via Bedrock |
| Azure OpenAI | GPT models via Azure |
| Ollama / Self-hosted | Your own vLLM or Ollama endpoint |
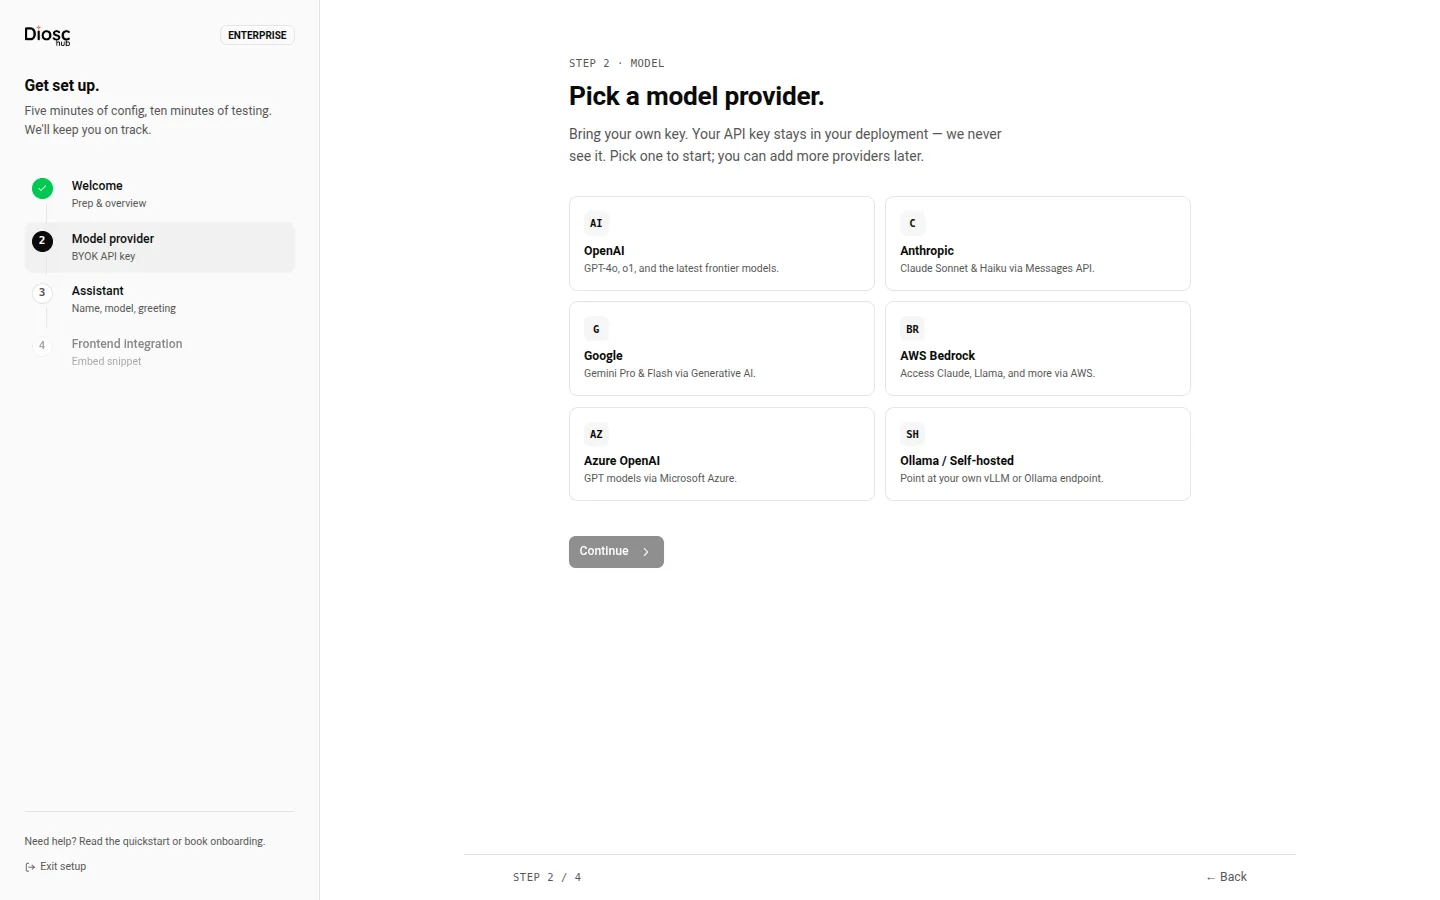
Selecting a card reveals the API-key field and the Test key button.
Pick a card and an API key field appears (masked). Test key runs one minimal completion against the provider from the hub server to confirm the key works — a real call that spends a few tokens. A green result confirms the key; a red result shows the provider’s error.
The test is a check, not a gate. Selecting a provider and entering a key is enough to press Continue — a valid key that fails the probe because your deployment blocks outbound calls will not trap you in the wizard. You can confirm the key independently in your provider’s dashboard, or by sending the first message once the assistant is live.
Manage providers and keys later on the Models page.
Step 3 — Assistant
Section titled “Step 3 — Assistant”This step creates the assistant. It collects three things:
- Assistant name — shown in the chat widget header and in the admin portal.
- Default model — the model id the assistant runs (defaults to
gpt-4o). The provider is carried over from step 2 and shown read-only. - Greeting — the first message shown to every visitor.
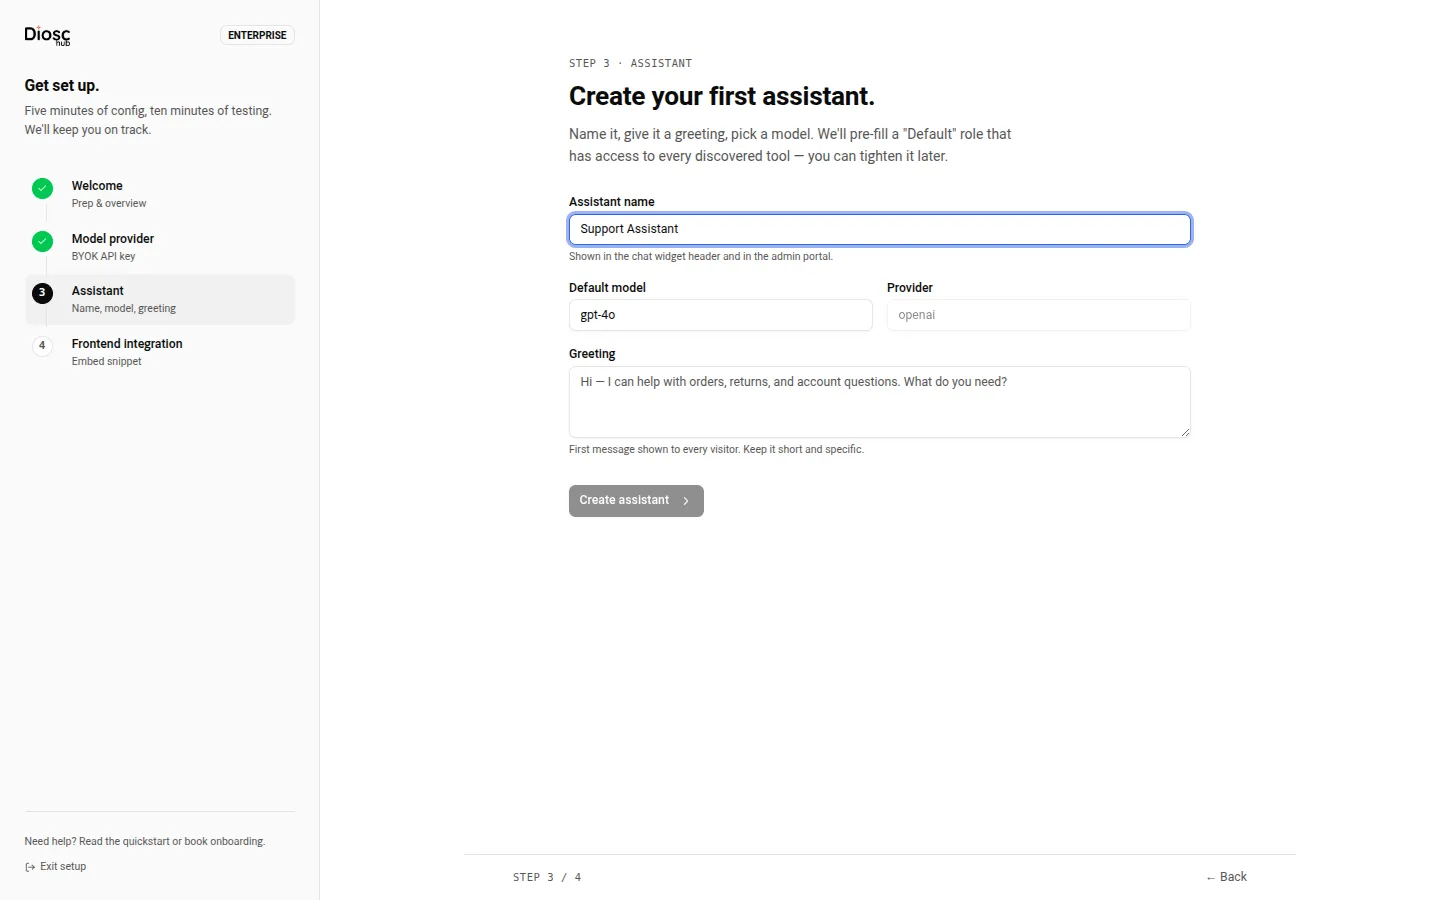
The create-assistant form. Name and greeting are required; the provider is fixed to your step-2 choice.
Create assistant writes the assistant to the backend (POST /admin/assistants) with the name, greeting, and llmConfig set from your provider and model choice. It also seeds a Default role that can reach every discovered tool — you tighten that later. On success the wizard immediately issues the assistant’s embed key in the background, so the next step is mostly display, and advances you to the frontend step.
The key you entered in step 2 is used only for the Test-key probe — the wizard does not store it. At runtime the assistant resolves its provider credential the same way every assistant does: from a credential you register on the Models page, or, failing that, from the provider’s environment variable in your deployment (for example OPENAI_API_KEY). If neither is present, register the credential on the Models page before the assistant can answer.
See Assistants & Roles for the full set of assistant and role fields.
Step 4 — Frontend integration
Section titled “Step 4 — Frontend integration”This step hands you what your frontend needs. It shows two credentials.
The embed key and loader snippet. The embed key is the public credential that identifies which assistant the widget loads; it is meant to ship in frontend code. The step displays a ready-to-paste script tag pointing at your hub:
<script src="https://your-hub.example.com/api/embed/YOUR_EMBED_KEY/loader.js" async></script>Drop it before </body>. If the key was not auto-issued on the previous step, a Generate embed key button mints one.
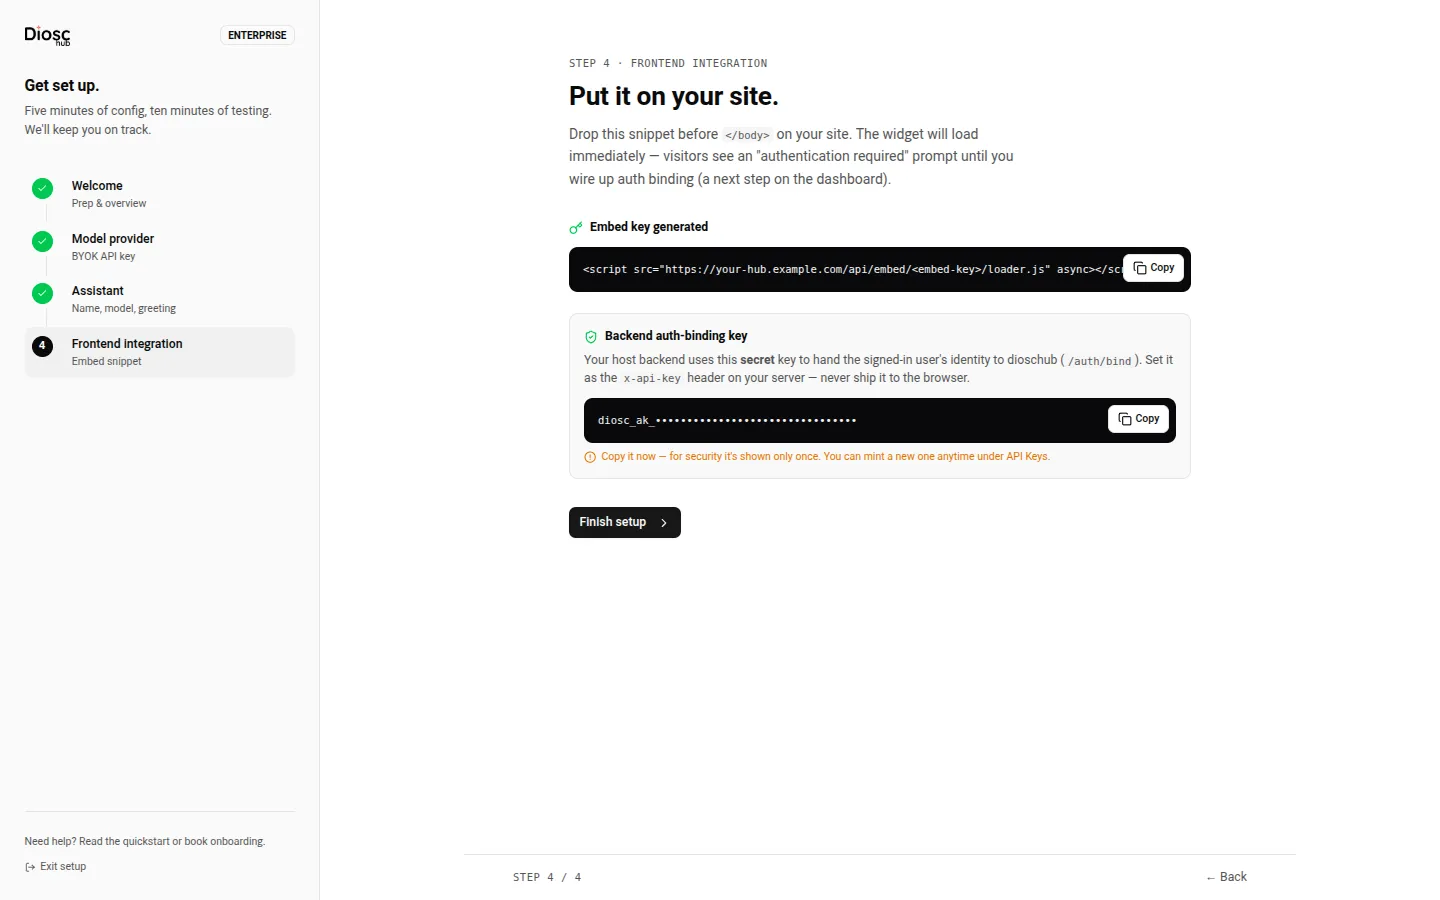
The embed step. The top box is the public loader snippet; the lower box is the one-time secret auth-binding key for your host backend. (The keys shown here are redacted.)
The backend auth-binding key. The step also mints a secret admin API key scoped to auth:bind, minted exactly once when you reach the step. Your host backend sets it as the x-api-key header to call /auth/bind and /auth/invalidate when handing over the signed-in user’s identity. It is a server-side secret — never ship it to the browser. It is shown once; copy it now. If you miss it, mint a new one later under the admin API Keys page.
The public embed key and the secret auth-binding key are different credentials with different jobs. The embed key selects the assistant; the auth-binding key asserts identity. Do not swap them.
Finish setup advances once the embed key exists. For the full integration — installing the client package, the React and vanilla-HTML variants, and driving the widget at runtime — see Quickstart: embed the chat and Frontend integration.
Step 5 — Done
Section titled “Step 5 — Done”The final step confirms the assistant is created and embeddable, and points you at the follow-up work that lives on the dashboard rather than in the wizard:
- Wire up auth binding — required before real users can sign in. Until it is done, the widget shows an authentication-required prompt.
- Connect tools (MCP) — optional; let the assistant call your systems.
- Tighten roles — the seeded Default role allows every tool; scope it per role.
- Add a knowledge base — upload docs the assistant can answer from.
Each card links straight to the matching admin page.
Everything is reachable without the wizard
Section titled “Everything is reachable without the wizard”The wizard is a convenience over the individual admin pages, not a separate system. The same actions live at:
- Providers and API keys → Models
- Assistants, greetings, and roles → Assistants & Roles
- Embed keys and the frontend snippet → Frontend integration
- Auth binding → Identity & auth
Run the wizard for the first assistant, then do the rest from the dashboard.